


Fermented foods and beverages are all the rage. If you don’t make your own, you are probably spending a small fortune over time to keep up with it! Water kefir is SO simple to make, and is inexpensive to keep up. Read on . . .
I will admit, the first time I tasted Kombucha, I gagged a little. I couldn’t stand it! My husband fell head over heels for the stuff. I knew it was good for me, and I desperately wanted the benefits (I was trying to heal damage to my gut and rid myself of gluten intolerance), but I could not sit down and drink a bottle of it.
Then I found the kombucha that contains chia seeds. And surprisingly, it wasn’t too bad! I could drink down the chia seeds no problem, which I know some find disgusting, but it helped mask the strength of the booch! I started drinking those on a regular basis, then slowly transitioned over to plain kombucha, which I can drink now and enjoy.
I came across water kefir a couple of years ago and was interested, but didn’t know anyone with water kefir grains that I could steal some from.

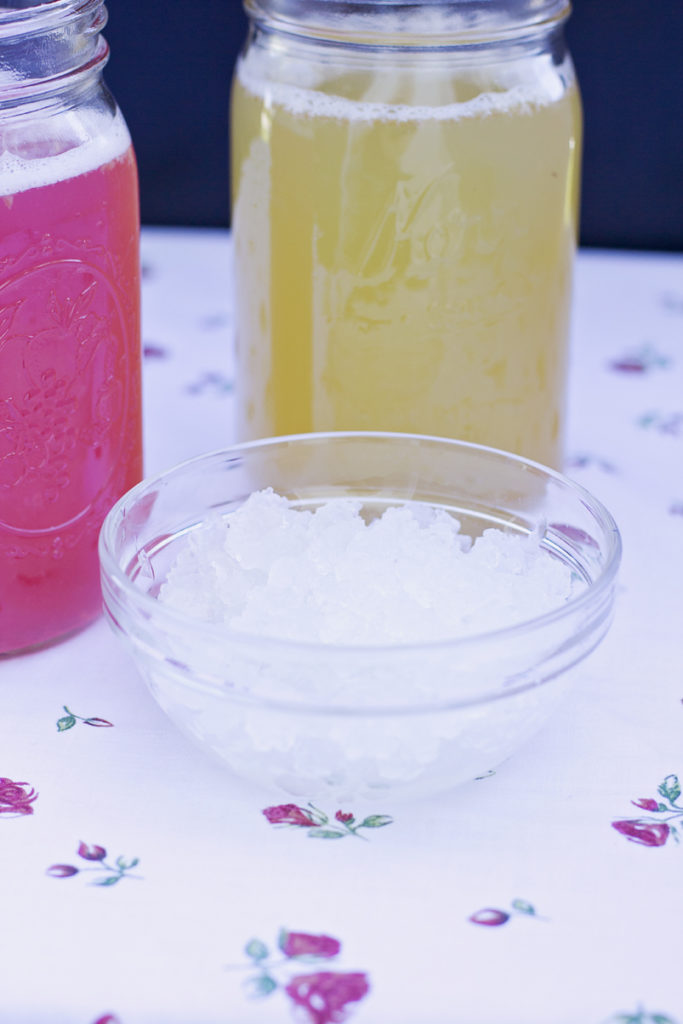
What is water kefir?
- a fermented beverage containing multiple strains of bacteria that help protect, repair, and nurture the gut! It is made with sugar water (coconut water can be used too), and the kefir grains digest the sugars. The remaining liquid does not have a high sugar content.
What is the difference between water kefir, milk kefir, and kombucha?
- quite simply, the amount/types of strains of bacteria present. Kombucha has more strains and will give slightly more benefit to the body, but that isn’t to downplay water kefir. This often-neglected beverage is a powerhouse and is much more beneficial than other cultured foods like yogurt, for example. Milk kefir also has more strains of good bacteria than water kefir. Water and milk kefir are different, and one cannot be made using the grains from the other.
I got lucky last summer and was given some water kefir grains by Esther Beazer, who is a fermentation rock star. She is the queen of fermented vegetables and I was in awe of ALL the fermented things when I stepped into her kitchen/pantry! It was GLORIOUS. She happily shared some grains with me, instructed me on how to use them, and sent me on my way.
That little baggie stayed in my fridge for a couple of weeks before I was ready to dive in. Once I did, and realized how easy it was, I got really excited.
My kids LOVE water kefir. Which thrills me. They are getting all of that good bacteria in their little tummies, which helps with digestion, immunity, and other wonderful benefits. Water kefir is mild, fruity, fizzy, and fun. They think it’s pop, and I don’t correct them. It is a real treat for them when a new batch is ready! I also like to use it to make my homemade gelatin.

How do you make water kefir?
The process is quite simple.
For the first ferment:
- Take a quart jar and add about 1 c of hot water.
- Dissolve 1/4 c sugar (I use organic cane sugar, but rapadura, sucanat, maple sugar, coconut sugar, etc can be used) into the water.
- Fill the jar about 1/2 c from the top with cool water.
- Add a scant 1/4 c water kefir grains.
- Cover with a non-airtight lid or cheesecloth (with a rubber band to prevent fruit flies).
- Leave on the counter for 48 hours, or in your oven with the light on if your kitchen is cool.
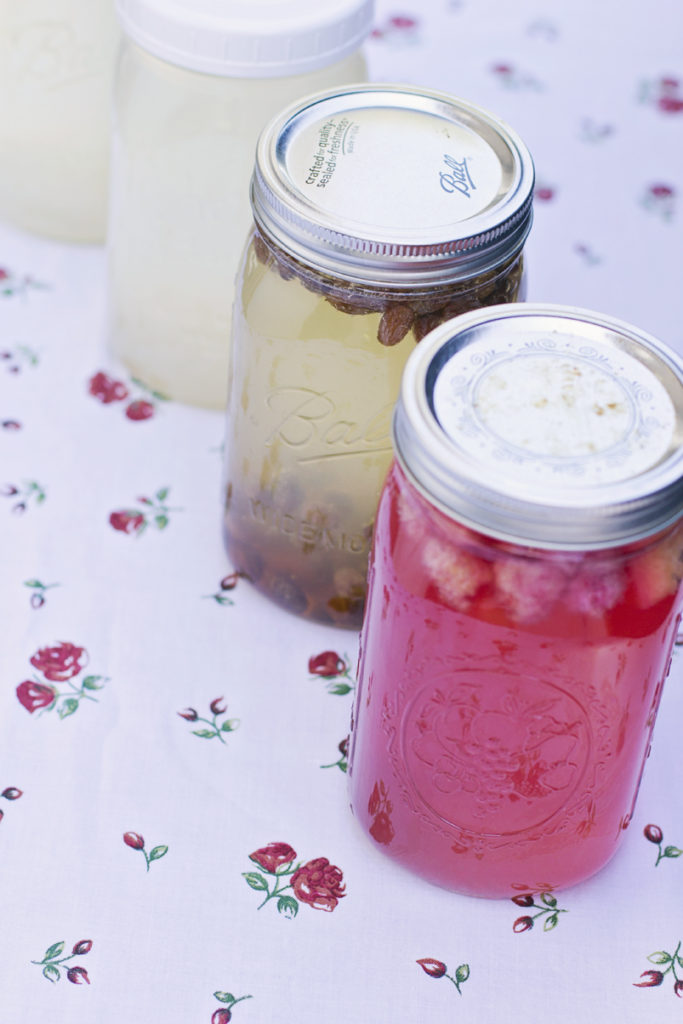
For the Second Ferment:
- After 48 hours, strain out your grains, reserving the liquid. I use a canning wide mouth jar funnel underneath a small colander to catch my grains.
- Set the grains aside.
- Add 1/2 c fruit juice, fruit puree, whole fruit pieces, etc. to the water kefir.
- Cover with an AIRTIGHT lid.
- Let sit for 48 hours, loosening the lid to remove gas as needed (you will see the lid bubble up from the pressure, just release it and tighten back up – about once a day).
- During this time the water kefir liquid will use up the sugars in the juice/fruit and create a delicious fruity, carbonated beverage that your tummy will thank you for!
- After 48 hours, place the flavored kefir in the fridge.
TIPS:
- I like to keep water kefir going constantly, so when I remove the grains from one batch and add my fruit juice, I start another batch right then and put the grains into it. I always have a first and second ferment going on my counter.
- Keep it warm! Water kefir is fickle, and changes with the seasons. During the summer it is AMAZING and extremely fizzy, but can be flat and boring in the Fall. If kept nice and warm, the kefir will be happy happy happy.
- Mix it up with different flavors. I buy Knudsen’s fruit juices and add a tiny splash of pure cranberry, tart cherry, or pomegranate along with the grape or apple juice that I buy from Costco. Other great options: frozen berries, peaches, fresh ginger added to berry flavored kefir, grapes, raisins, lemon/lime juice, the list goes on.
- You don’t need to rinse your grains in between batches, just throw them into the new batch.
- Grains will multiply and grow. Store the extra in sugar water in a glass jar in the fridge. I throw a tablespoon of grains into smoothies for a great probiotic boost.
- Share grains with friends when you are overwhelmed. Kefir grains have no known origin. So when you find some, grab them and take care of them.
Water kefir is simple, has great benefits, and is inexpensive to make. For my season of life right now, it’s a great option. I know my kids will drink it, it takes me only 5 minutes every 48 hours to keep up, and it’s FUN. I don’t drink pop, but it is nice to have something fizzy around to change things up a bit.
The hardest part about it is finding those grains! Once I figure out a way to ship them . . . I might have some to share! Check local classified ads (I have seen grains/scobies for kombucha there before), ask around, put the word out. You might be surprised at what your neighbors are hiding in their fridges.
Have you tried water kefir? Kombucha? Which do you prefer?


Currently I make milk kefir and kombucha. Milk kefir is a given for the best smoothies. Kombucha cause I love it. I’ve contemplated water kefir, but can’t see a reason for it when we already have the other two. My daughter loves Kombucha, but my boys don’t so I was curious if they’d like water kefir. Think brewing all three is really necessary?
NO, I definitely wouldn’t do all three! If you are doing the other two, that’s perfect!
My sister in law gave me a start and she said you have to use unclorinated water. Have found that to be true? It would be easier (and cheaper) to just use the stuff out of the tap.
Yes you do! The chlorine will kill it. A simple way to do it is fill a pitcher or jar with water from your tap and just leave it out overnight. The chlorine will evaporate and you are good to go!
I’ve looked around and can’t seem to find any available grains. (I even checked local classifieds.) would you be willing to share?
I would love to share. I don’t know how to ship them though? In liquid??! Any suggestions?
Shoot! I am just now seeing this. (Eye roll. Why didn’t I check sooner?!) I actually just bought some grains online. I hope they survive. But I live in Davis county and drive up to Logan fairly often. Maybe if they don’t make it you could give me some pointers?!
yes of course!!! let me know how it goes!